Hướng dẫn hỗ trợ người dùng
- Hướng dẫn sửa máy in
- Xử lý khi không tìm thấy máy in lúc in trong trình duyệt
- Access Denied, Unable to connect in Prinnter
- Lỗi windows cannot connect to the printer. no printers were found.(Lỗi 0x00000bc4, lỗi không tìm thấy máy in trên Windows 11)
- Lỗi không tìm thấy máy tính share máy in
- Hướng dẫn sửa lỗi không kết nối được máy in ( Windows cannot connect to the printer. Operation failed with error 0x0000011b.)
- Hướng dẫn sửa lỗi Operation could not be completed (error 0x00000005).
- Hướng dẫn sửa lỗi Operation could not be completed (error 0x0000007e)
- Hướng dẫn sửa lỗi kết nối được máy in nhưng không in được khi máy in bật mode wifi EPSON L8050
- Hướng dẫn sửa mạng
- Hướng dẫn sửa office
- Xử lý khi file mở lên review lúc được lúc không, hoặc lúc nào excel ,word , outlook có lỗi
- Xử lý khi lỗi "Microsoft ace oledb 12 0' Provider is Not Registered on the Local Machine"
- Fix Outlook 0x8004060C error during Send/Receive.
- Cách khắc phục lỗi We can't install khi cài đặt Office 365
- Hướng dẫn sửa lỗi mail outlook bị chặn bằng gmail app password
- Hướng dẫn sửa phần mềm trên windows
- Xử lý khi đôi lúc usb bị tắt, phải dựt ra cắm lại
- Xử lý lỗi "How to fix This file does not have an app associated with it for performing this action. Please install an app or, if one is already installed, create an association in the Default
- Hướng dẫn sửa phần mềm thêu lỗi sentinel ldk protection system internal error 0x7101 occurred
- Hướng dẫn sửa Wilcom
- Note Outlook
- Hỗ trợ Remote Desktop bị hỏng
- Microsoft Teams
- Sửa lỗi Remmina không kết nối được vào server
Hướng dẫn sửa máy in
Xử lý khi không tìm thấy máy in lúc in trong trình duyệt
Cách 1:
- Vào "Cài cặt -> thiết bị và máy in" kiểm tra có máy in cần dùng không.
- Nếu có thì "Reload page". Nếu không có thì xem lại những cách thêm máy in cho máy tính.
Cách 2:
- Nhấn chọn phím Window cùng phím R.
- Gõ lệnh Services.msc sau đó nhấn Enter.
- Tìm Workstation, nhấn chuột phải chọn Restart
Access Denied, Unable to connect in Prinnter
1. Khởi động lại dịch vụ Printer Spooler
- Bước 1: Nhấn tổ hợp hai phím phím Windows + R, tiếp tục nhập services.msc và ấn Enter.
- Bước 2: Truy cập và tìm và nhấn đúp vào mục Print Spooler.
- Bước 3: Lúc này, cửa sổ giao diện mới sẽ hiện ra, ở mục Service status, ấn chọn Stop, tiếp tục ấn chọn mục Start để tiến hành khởi động lại dịch vụ.
- Bước 4: Ấn chọn OK. Tiếp tục kiểm tra lại kết nối giữa máy in và máy tính xe đã ổn định trở lại hay chưa.
2. Khắc phục lỗi Troubleshooter printer
- Bước 1: Mở hộp Control Panel trên máy tính.
- Bước 2: Tại Hardware and Sound, chọn View services and printers.
- Bước 3: Bấm chuột phải vào tên máy in của bạn -> chọn Troubleshoot.
- Bước 4: Đến đây, Windows sẽ tự rà soát, phát hiện và khắc phục lỗi.
- Bước 5: Khi thông báo xuất hiện, chọn Apply this fix.
- Bước 6: Sau khi lỗi đã được sửa (fixed), dấu tick xanh sẽ hiện ra. Lúc này bạn chỉ cần kết nối lại máy tính với máy in để xem kết quả.
3. Set a default printer in Windows
- Bước 1: Select Start > Settings .
- Bước 2: Go to Bluetooth & devices > Printers & scanners > select a printer. Then select Set as default.If you don't see the Set as default option, the Let Windows manage my default printer option may be selected. You'll need to clear that selection before you can choose a default printer on your own.
Lỗi windows cannot connect to the printer. no printers were found.(Lỗi 0x00000bc4, lỗi không tìm thấy máy in trên Windows 11)
Nhận biết: Lỗi 0x00000bc4
- Mở network -> tìm máy share -> double click máy in -> thông báo lỗi 0x00000bc4
- Thay đổi cài đặt Group Policy.
Bước 1: Nhấn Win+R
Bước 2: Gõ gpedit.msc
Bước 3: Ở Group Policy Editor và tìm tới cài đặt sau trong phần Computer Configuration:
Bước 4: Administrative Templates -> Printers -> Configure RPC connection settings.
Bước 6: Chọn Enabled
Bước 7: Ở ô bên dưới, tìm Protocol to use for outoging RPC connections, nhấn mũi tên xổ xuống
Bước 8: Chọn RPC over named pipes.
Bước 9: Apply -> ok
=> không cần restart máy. nó tự nhận lại mấy cái máy in đã bị mất do update
Link: https://quantrimang.com/cong-nghe/khac-phuc-loi-0x00000bc4-193551
Lỗi không tìm thấy máy tính share máy in
- Kiểm tra 2 máy cùng ipv4 default gateway
- Nếu 2 máy không cùng ipv4 default gateway thì đưa 2 máy về cùng 1 ipv4 default gateway
Bước 1: Vào Internet & NetWork -> ethernet.
Bước 2: Ip settings -> chọn Edit.
Bước 3: Chọn Manul -> Bật IPv4.
Bước 4: Preferred DNS -> nhập ipv4 default gateway -> save.
- Lỗi permission denied khi connect máy với window credential
Cách 1: Đăng nhập bằng Tài khoản và mật khẩu của máy share
Cách 2: Đăng nhập bằng tài khoản guest
Hướng dẫn sửa lỗi không kết nối được máy in ( Windows cannot connect to the printer. Operation failed with error 0x0000011b.)
Bước 2: Tìm đến khóa theo đường dẫn: HKEY_LOCAL_MACHINE\System\CurrentControlSet\Control\Print
Bước 3: Tạo một giá trị DWORD-32bit mới có tên RpcAuthnLevelPrivacyEnabled và đặt giá trị của nó là 0
Bước 4: Khởi động lại dịch vụ Printer Spooler
Bước 5: Nhấn tổ hợp hai phím phím Windows + R, tiếp tục nhập services.msc và ấn Enter.
Bước 6: Truy cập và tìm và nhấn đúp vào mục Print Spooler.
Bước 7: Lúc này, cửa sổ giao diện mới sẽ hiện ra, ở mục Service status, ấn chọn Stop, tiếp tục ấn chọn mục Start để tiến hành khởi động lại dịch vụ.
Bước 8: Ấn chọn OK. Tiếp tục kiểm tra lại kết nối giữa máy in và máy tính xe đã ổn định trở lại hay chưa.
Hướng dẫn sửa lỗi Operation could not be completed (error 0x00000005).
Bước 1: Mở Regedit
Bước 2: Tìm đến HKEY_CURRENT_USER\Software\Microsoft\Windows NT\CurrentVersion\Windows
Bước 3: Chuột phải chọn Permission
Bước 4: Chọn full control permission cho user
Bước 5: Xóa tất cả các file trong HKEY_CURRENT_USER\Software\Microsoft\Windows NT\CurrentVersion\Windows
Bước 6: Restart máy
Hướng dẫn sửa lỗi Operation could not be completed (error 0x0000007e)
Cách 1: Restart Print spool
Cách 2: Copy file hệ thống “mscms.dll”
-
Tìm đến thư mục C:Windowssystem32và tìm kiếm file mscms.dll
-
Copy file trên tới vị trí sau:
-- C:\windows\system32\spool\drivers\x64\3 Nếu bạn đang dùng hệ điều hành 64-bit.
-- C:\windows\system32\spool\drivers\w32x86\3 Nếu bạn đang dùng hệ điều hành 32-bit.
-
Kết nối lại máy in
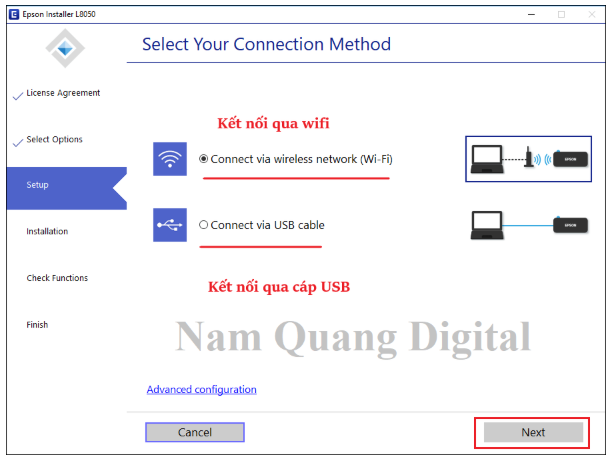
Hướng dẫn sửa lỗi kết nối được máy in nhưng không in được khi máy in bật mode wifi EPSON L8050
B.1: Cài đặt máy in qua chế độ wifi
-
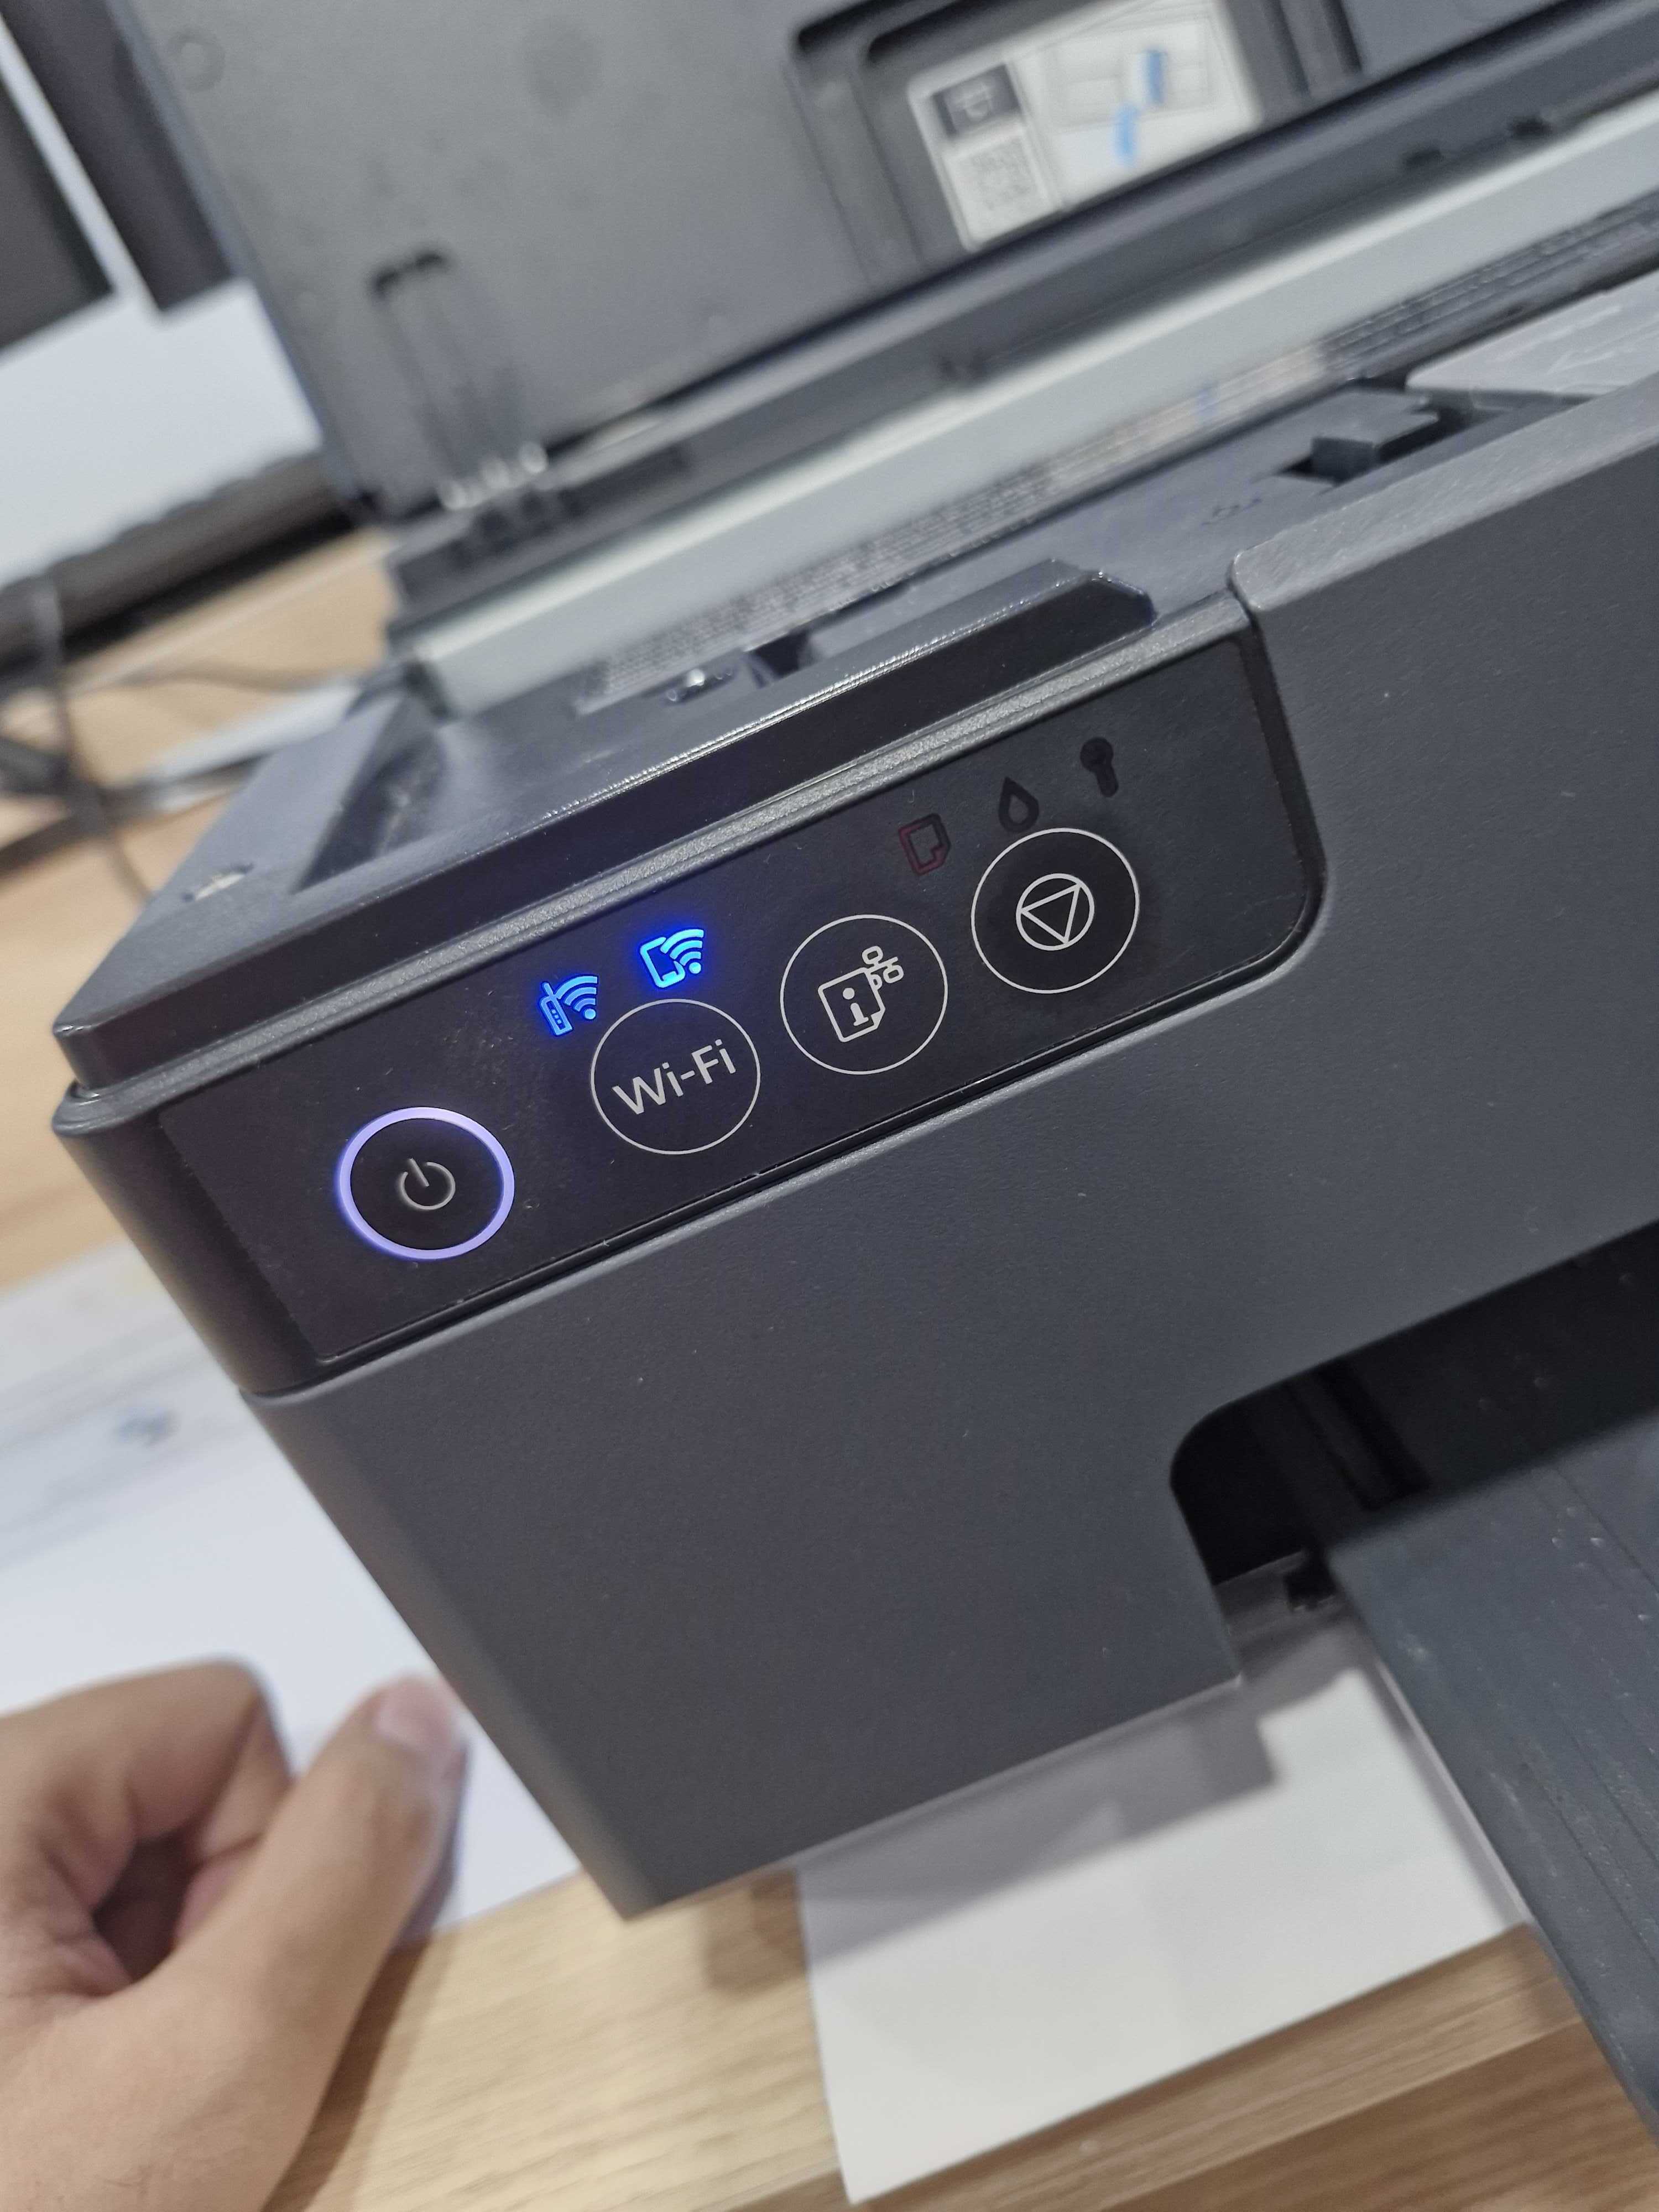
Cài đặt máy in: nhấn giữ nút Wifi sao cho bật được 2 đèn như hình (khoảng 5-7 giây chuyển chế độ, lặp đi lặp lại tới khi được)

-
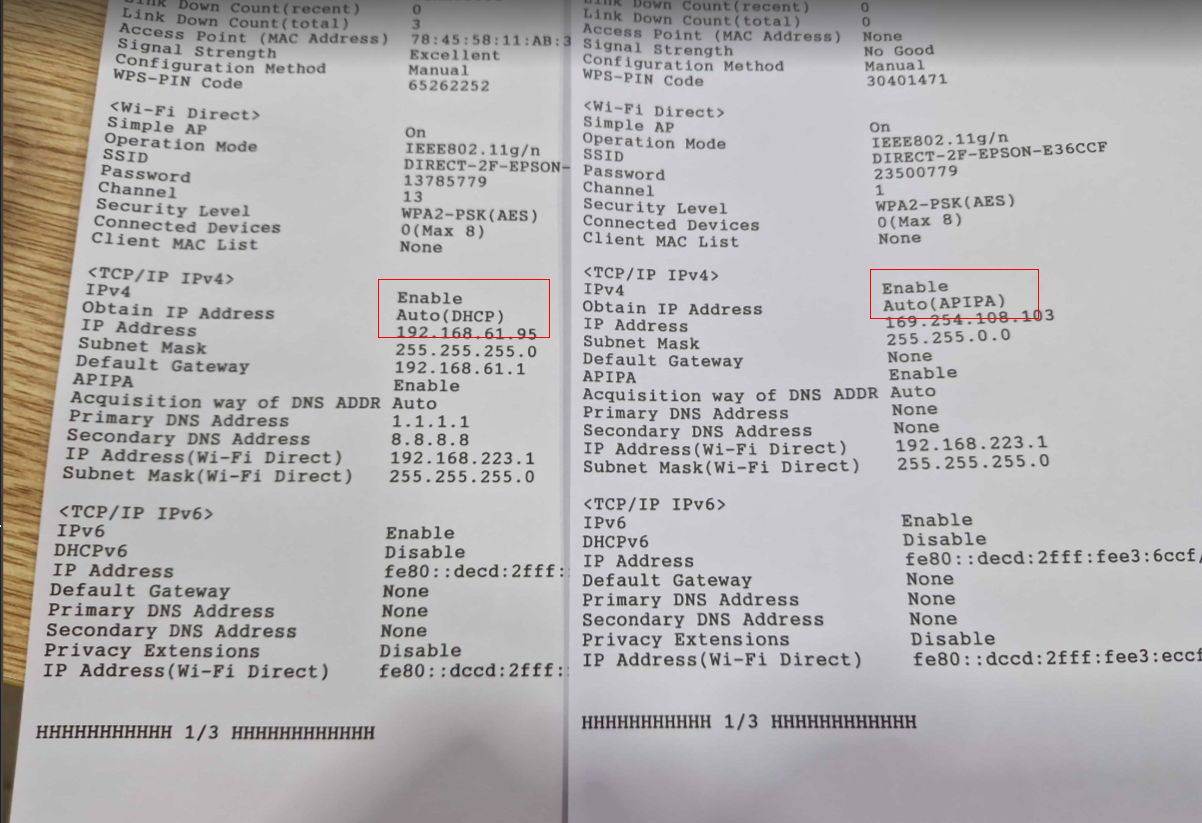
Nhấn giữ nút Settings (i) từ 5 - 7 giây sẽ in ra thông tin máy in như hình để lấy SSID, passowrd nếu cần. Khi in thì Obtain IP Address cần phải là DHCP như hình

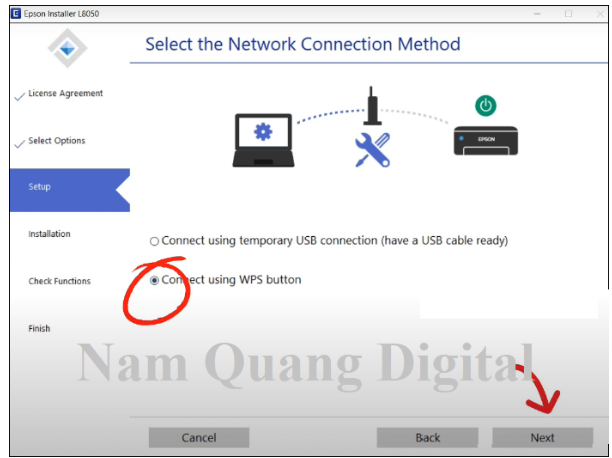
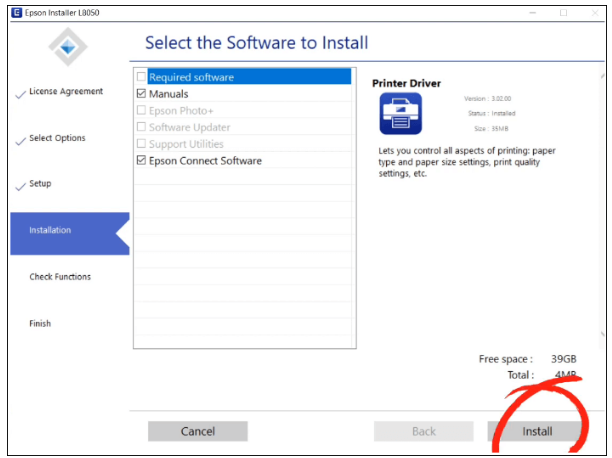
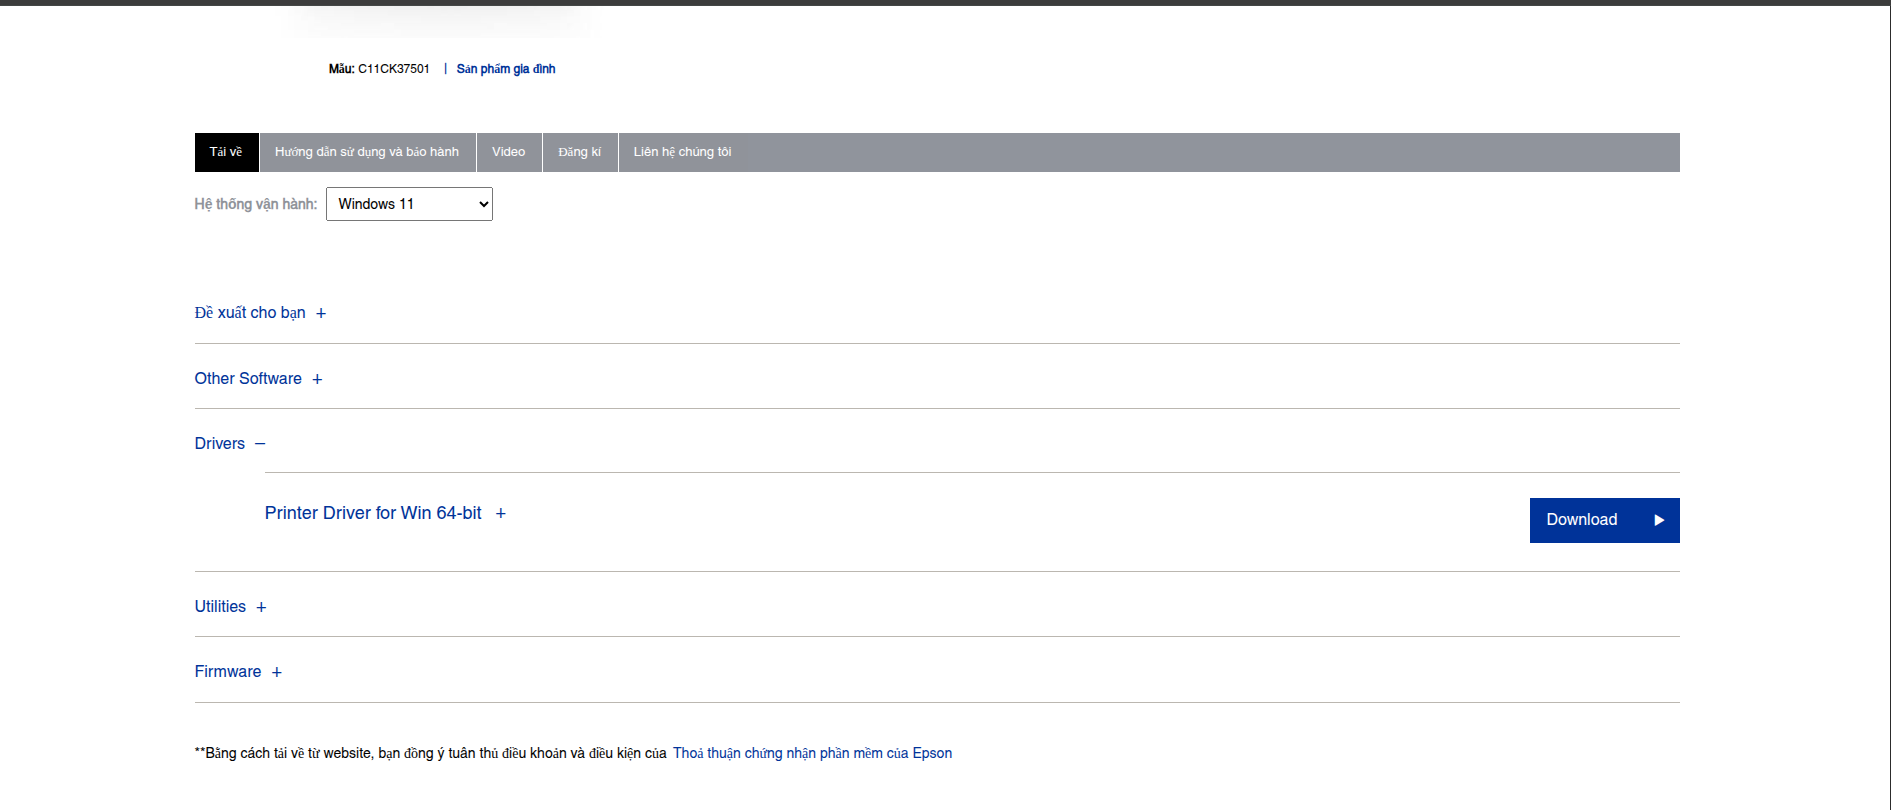
B.2: Cài driver cho máy setup máy in và các máy khách
-
Máy setup máy in:
-
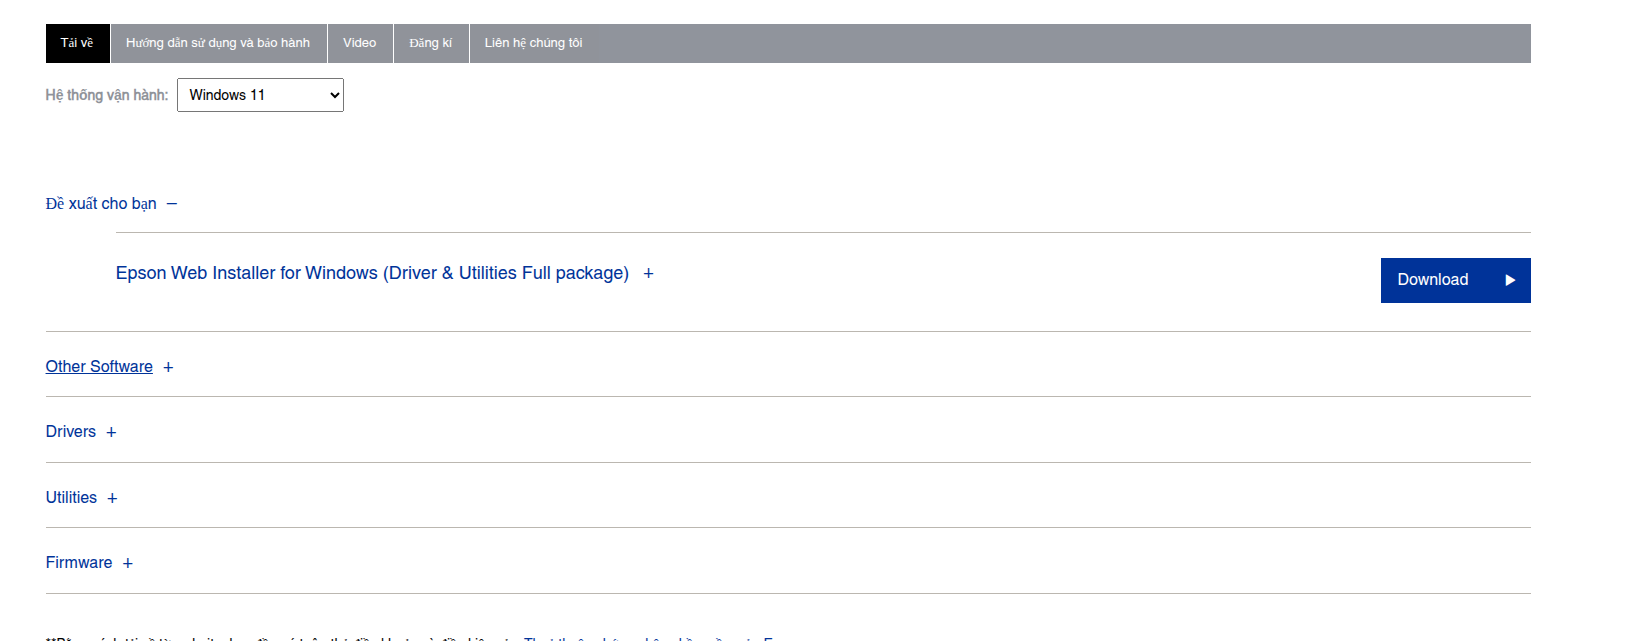
Vào đường dẫn để chọn hệ điều hành và bấm go:
URL: https://www.epson.eu/en_EU/support/sc/epson-l8050/s/s2674
-
Cài "Epson Web Installer for Windows (Driver & Utilities Full package) "

-
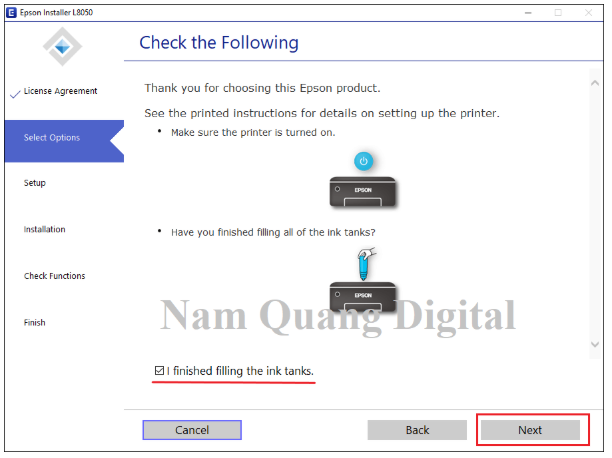
Khi mở phần mềm nên rút dây Lan chừa mỗi wifi để phần mềm tự setup cho dễ


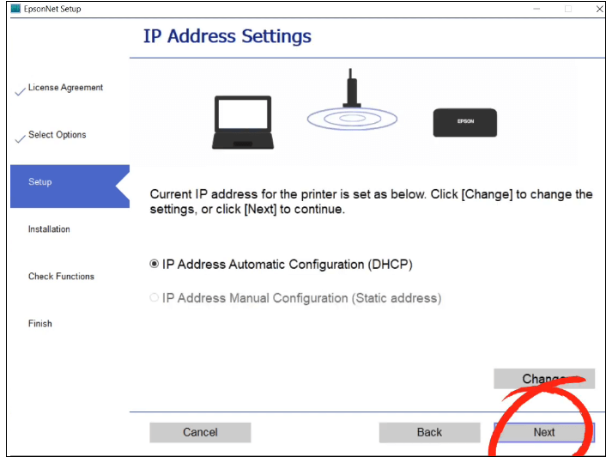
-----------------------TH1------------------------
- (Nếu có bước này thì chọn DHCP)


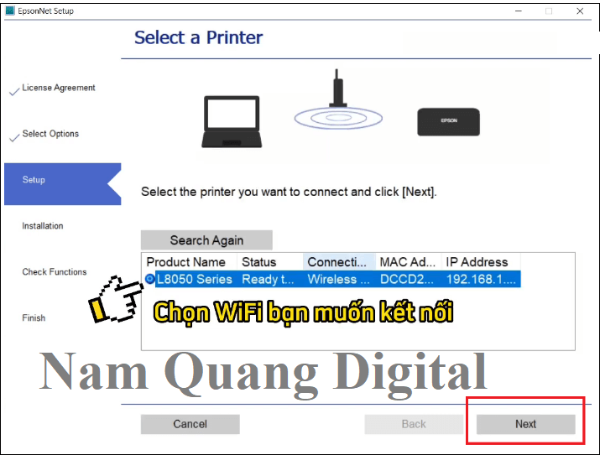
-------------------------TH2---------------------
- Nếu yêu cầu nhập SSID và Password thì quay lại B.1 phần nhấn nút setting (i) để lấy mã
-
-
Máy khách cần kết nối máy in
URL Driver: https://www.epson.eu/en_EU/support/sc/epson-l8050/s/s2674

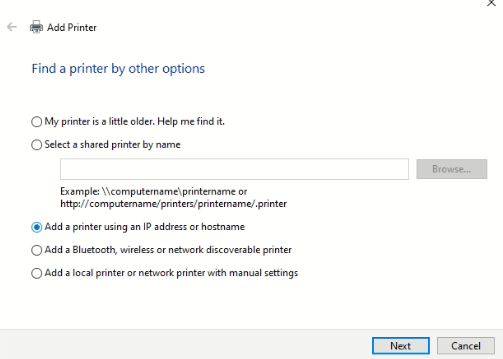
B.3: Kết nối máy in
-
Vào Printers and Scanners -> Add devices
-
Chọn máy in trong danh sách
-
Nếu không được thì chọn The printer that I want isnt listed
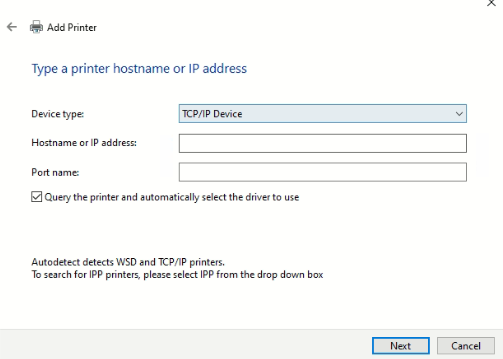
. Chọn add bằng IP

. Chọn TCP/IP Device nhập IP Address máy in
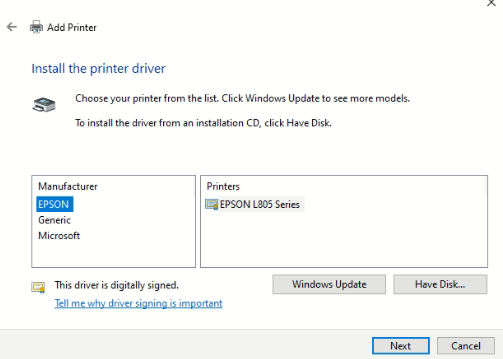
 . Manufacturer chọn EPSON Printers chọn model máy in (VD: EPSON L8050 Series)
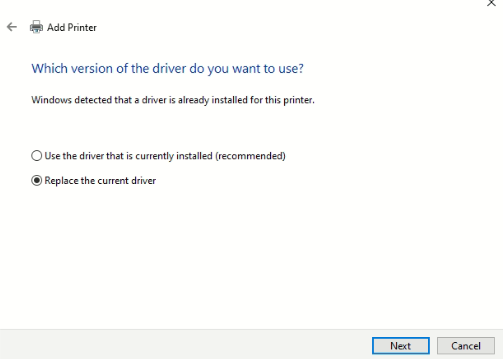
. Chọn replace the current driver

-
Hướng dẫn sửa mạng
Xử lý khi dây mạng đã cắm và có đèn nhưng không có mạng
Cách sửa:
- Không chọn Use DNS
- Nếu chọn thì sửa dòng:
DNS trên là 8.8.8.8
DNS dưới 8.8.4.4
Hướng dẫn sửa office
Xử lý khi file mở lên review lúc được lúc không, hoặc lúc nào excel ,word , outlook có lỗi
B1: tìm "Add or remove programs" ở thanh search của windows
B2: Tìm đến phần mềm "microsoft 365" chọn 3 chấm
B3: Chọn Modify để hiện cửa sổ "Microsoft"
B4: Chọn "Quick Repair" và nhấn Repair.
Done
Xử lý khi lỗi "Microsoft ace oledb 12 0' Provider is Not Registered on the Local Machine"
B1: Vào google.com tìm (Microsoft Access Database Engine 2016 Redistributable) và tải "accessdatabaseengine.exe"
B2: Vào CMD di chuyển và chạy câu lệnh:
B2.1: d: -> enter
B2.2: cd nơi lưu file vừa tải -> enter
B2.3: accessdatabaseengine.exe /quiet -> enter
B3 đợi CMD thứ 2 tắt là done
Fix Outlook 0x8004060C error during Send/Receive.
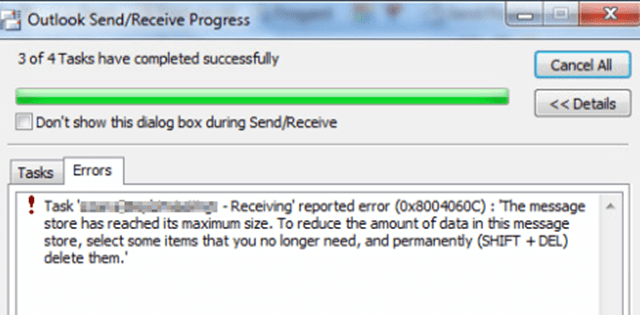
Outlook "0x8004060C" occurs when the Outlook PST data file
(aka "Message store", e.g. the "outlook.pst" file), or the OST file (for IMAP/Exchange accounts), exceeds the default maximum size limit. For example in Outlook 2007 the maximum size limit of the PST file is 20GB. If this limit is reached, then you will receive a notification error message during send/receive operation, that says "Task 'example@server.com – Receiving' reported error (0x8004060C): 'The message store has reached its maximum size. To reduce the amount of data in this this message store, select some items that you no longer need, and permanently (SHIFT + DEL) delete them.'".
To resolve the 0x8004060C maximum limit error you have have the following two (2) options: The first option is to permanently delete (SHIFT + DEL) some email messages that you don't want any more (as the error 0x8004060C message suggests) and the 2nd option is to specify a new larger maximum size limit for the Outlook message store.
To specify a new larger maximum limit for the Outlook message store (.PST file) and fix the "0x8004060C" Send/Receive error in Outlook 2003, 2007, 2010 or 2013 follow the steps below:
How to increase the Outlook's PST store maximum default size limit (Outlook 2003, 2007, 2010, 2013).
Step 1. Increase Outlook's Message Store maximum size limit through Windows Registry.*
*** Note: Before proceeding to modify the registry, close Outlook.**
-
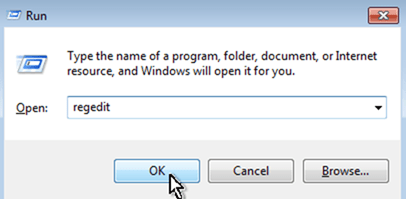
Open Registry Editor: To do that:
Simultaneously press “Windows” + “R” keys to open the RUN window. In “RUN” window “Open” box, type: regedit Press Enter.
- Inside Windows registry navigate (from the left pane) at the following path according your Outlook version: *
For Standard users:
Outlook 2016, 2019 & 365: HKEY_CURRENT_USER\Software\Microsoft\Office\16.0\Outlook\PST
Outlook 2013: HKEY_CURRENT_USER\Software\Microsoft\Office\15.0\Outlook\PST
Outlook 2010: HKEY_CURRENT_USER\Software\Microsoft\Office\14.0\Outlook\PST
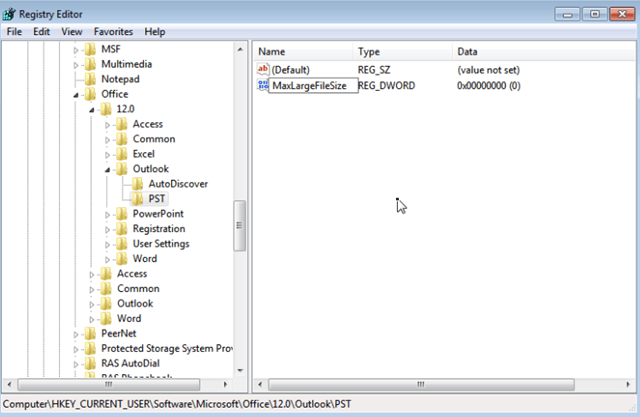
Outlook 2007: HKEY_CURRENT_USER\Software\Microsoft\Office\12.0\Outlook\PST
Outlook 2003: HKEY_CURRENT_USER\Software\Microsoft\Office\11.0\Outlook\PST
For Domain Administrators: (Group Policy)
Outlook 2016, 2019 & 365: HKEY_CURRENT_USER\Software\Policies\Microsoft\Office\16.0\Outlook\PST
Outlook 2013: HKEY_CURRENT_USER\Software\Policies\Microsoft\Office\15.0\Outlook\PST
Outlook 2010: HKEY_CURRENT_USER\Software\Policies\Microsoft\Office\14.0\Outlook\PST
Outlook 2007: HKEY_CURRENT_USER\Software\Policies\Microsoft\Office\12.0\Outlook\PST
Outlook 2003: HKEY_CURRENT_USER\Software\Policies\Microsoft\Office\11.0\Outlook\PST
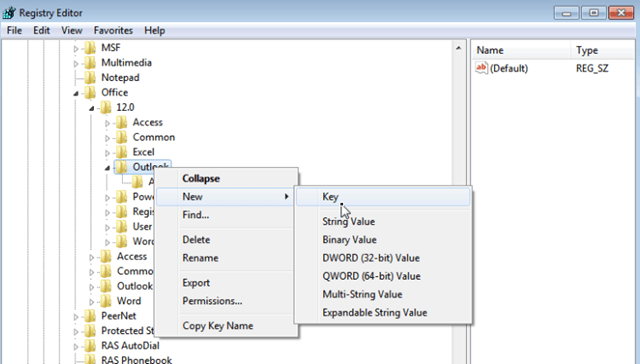
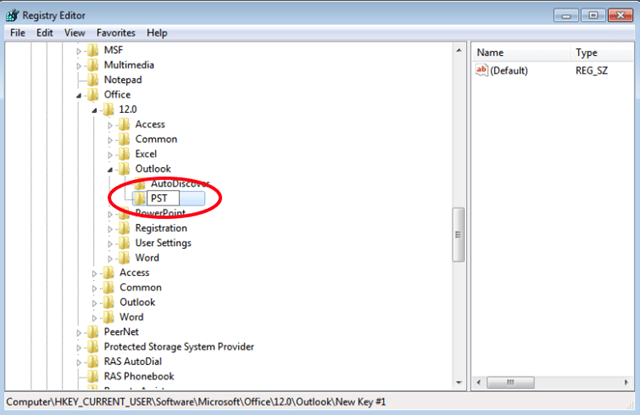
Note: If the "PST" key doesn't exist, then right–click at Outlook key and select New > Key. Give at the new key the name: PST
-
Click at PST key and look at the right pane to find these two (2) values: *
MaxLargeFileSize WarnLargeFileSize

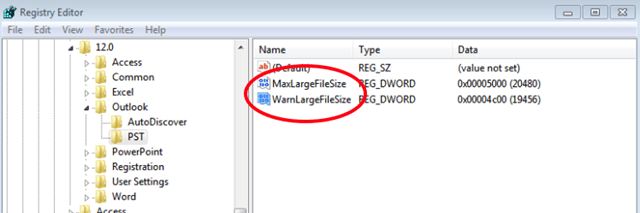
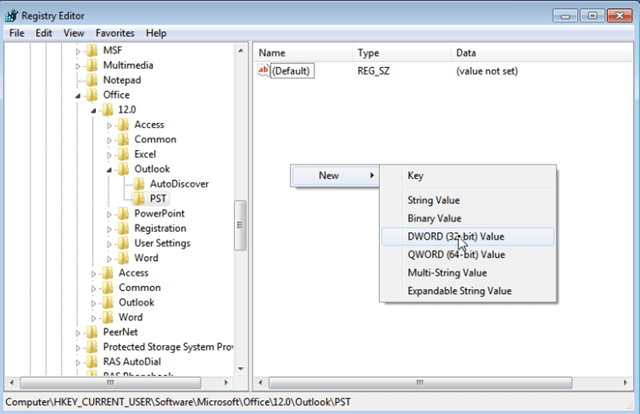
Note: If the above two values doesn't exist, then right–click at an empty space on the right pane and select New > DWORD Value. Give at the new DWORD Value the name MaxLargeFileSize & press Enter. Perform the same operation to create a new DWORD value with name: WarnLargeFileSize.
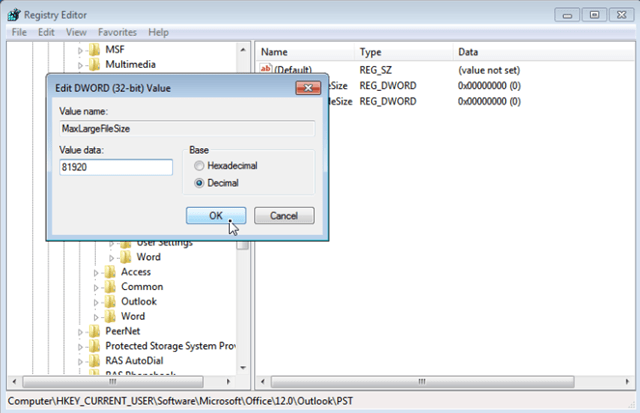
- Double click to open MaxLargeFileSize value:
a. Select Decimal. b. Then at the Value data: box type the new maximum size limit for the Outlook message store (PST file) according the following:
The Outlook 2003 & 2007 default message store maximum limit is 20GB, so you have to specify a size over 20GB.
The Outlook 2010 & 2013 default message store maximum limit is 50GB, so you must specify a size over 50GB.
1GB=1024MB, 10GB=10240MB, 20GB=20480, 40GB=40960MB, 80GB=81920MB, etc.
For example. If you use Outlook 2010 the maximum size limit is 50GB. So you have to specify a larger size e.g. 80GB. For accomplish this, you have to enter the number "81920" (without the quotes) in the Value data box.
c. Select OK.
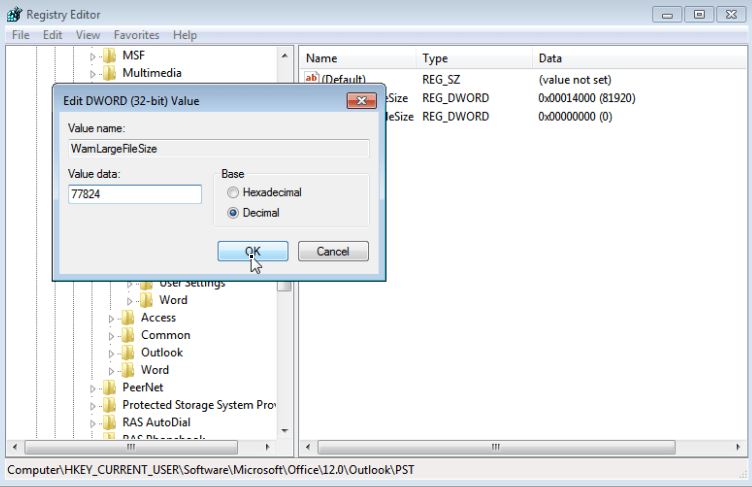
- Then double click to open the WarnLargeFileSize value:
a. Select Decimal. b. At the Value data: box type the new warning size limit for the Outlook message store (PST file) according the following:
The Warning size should be the 95% of the MaxLargeFileSize value you entered before.
For example: If you entered the value "81920" at MaxLargeFileSize, then the WarnLargeFileSize value should be: 81920 X 95% = 77824.
c. Select OK.
-
Close Registry Editor.
-
Finally open Outlook. The send/receive 0x8004060C error should be gone!
That’s all folks! Did it work for you?
Cách khắc phục lỗi We can't install khi cài đặt Office 365
Bước 1: Tìm kiếm regedit
Bước 2: Nhấn Registry Editor
Bước 3: Expand HKEY_LOCAL_MACHINE By Clicking on 〉
Bước 4: Expand SOFTWARE By Clicking on 〉
Bước 5: Expand Policies By Clicking on 〉
Bước 6: Expand Microsoft By Clicking on 〉
Bước 7: Expand Office By Clicking on
Bước 8: Expand 16.0 By Clicking on 〉
Bước 9: Expand Common By Clicking on 〉
Bước 10: Right-Click on OfficeUpdate
Bước 11: Nhấn Delete
Bước 12: Khởi động lại máy tính
Hướng dẫn sửa lỗi mail outlook bị chặn bằng gmail app password
Bước 1: Đăng nhập mail
Bước 2: Vào Tài khoản Gmail -> chọn quản lý tài khoản
Bước 3: Chọn Bảo mật -> xác minh 2 bước
Bước 4: Chọn thêm SĐT -> Nhập SĐT -> Nhập mã gửi về SĐT
Bước 5: Vào gmail app password setup -> Sign in with app passwords -> chọn Create and manage your app password
Bước 6: Đăng nhập lại tài khoản email -> Nhập outlook -> enter
Bước 7: Copy passwords mới
Bước 8: Nhập passwords mới -> ok.
Hướng dẫn sửa phần mềm trên windows
Xử lý khi đôi lúc usb bị tắt, phải dựt ra cắm lại
B1: tìm "Edit power plan" ở thanh search của windows
B2: Trong cửa sổ "Change setting for the plan balanced: High performance" chọn "Change advanced power settigns"
B3: Trong cửa sổ "power Options" tìm "USB settings -> USB selective suspend settings -> Disabled"
Done
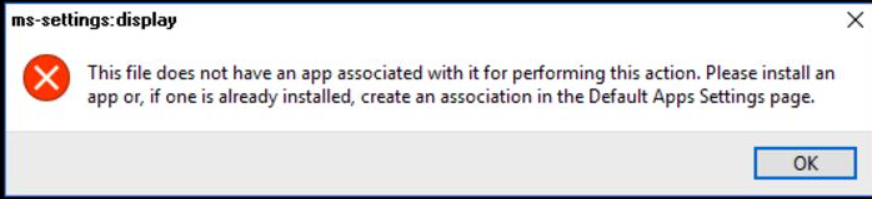
Xử lý lỗi "How to fix This file does not have an app associated with it for performing this action. Please install an app or, if one is already installed, create an association in the Default
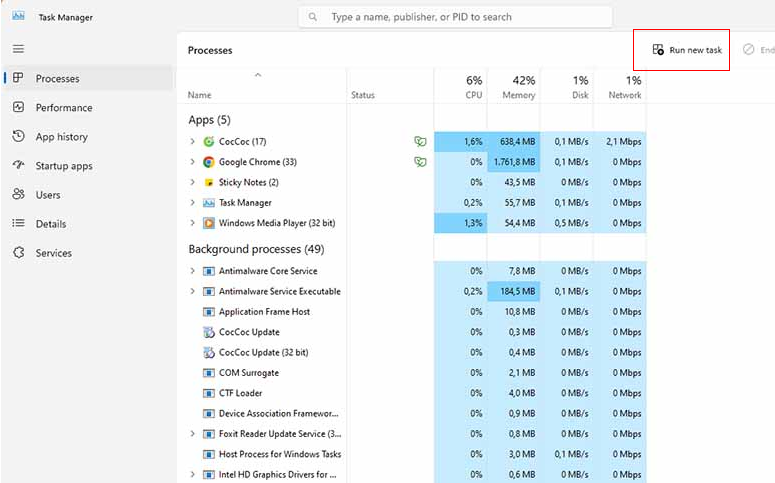
B.1: Ctrl + Shift + Esc mở Task Manager.
B.2:
- Win 10: mở file -> run new task -> regedit
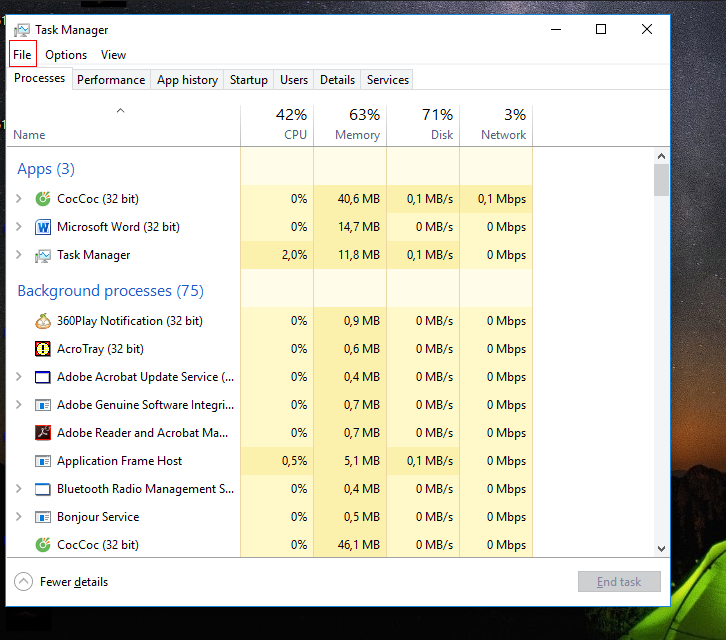
- Win 11: run new task -> regedit
B.3: Truy cập vào Computer\HKEY_CLASSES_ROOT\Inkfile.
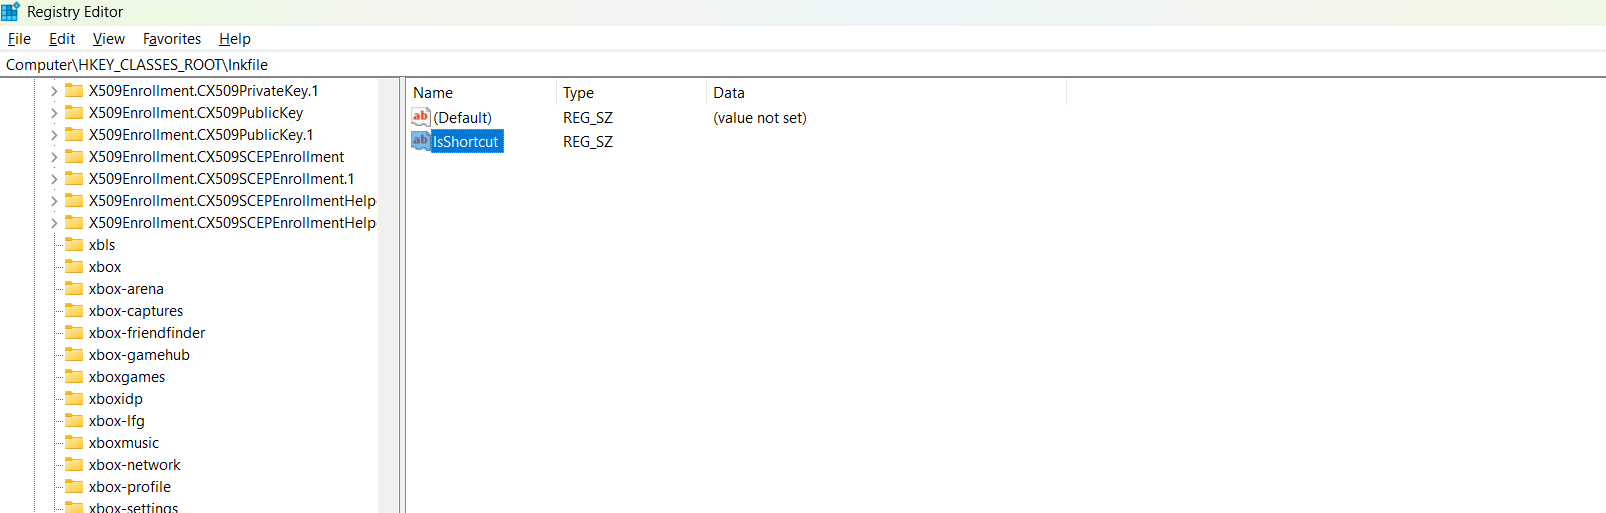
B.4: Xóa IsShortcut -> Tạo lại IsShortcut
B.5: Mở cmd (admin) chạy lệnh bên dưới
sfc /scannow
DISM /Online /Cleanup-Image /CheckHealth
DISM /Online /Cleanup-Image /ScanHealth
DISM /Online /Cleanup-Image /RestoreHealth
B.5 Restart
Hướng dẫn sửa phần mềm thêu lỗi sentinel ldk protection system internal error 0x7101 occurred
Link: https://www.youtube.com/watch?v=IF8I84f4p4w
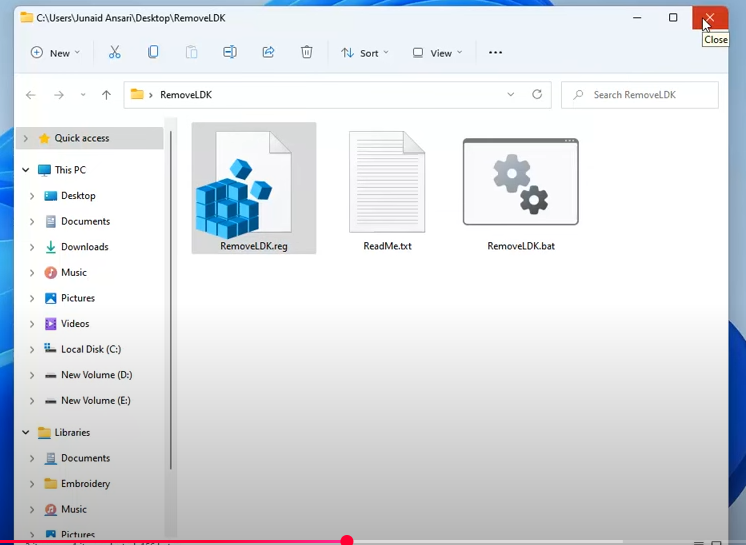
Bước 1: Chọn RemoveLDK.reg
Bước 2: Chọn yes
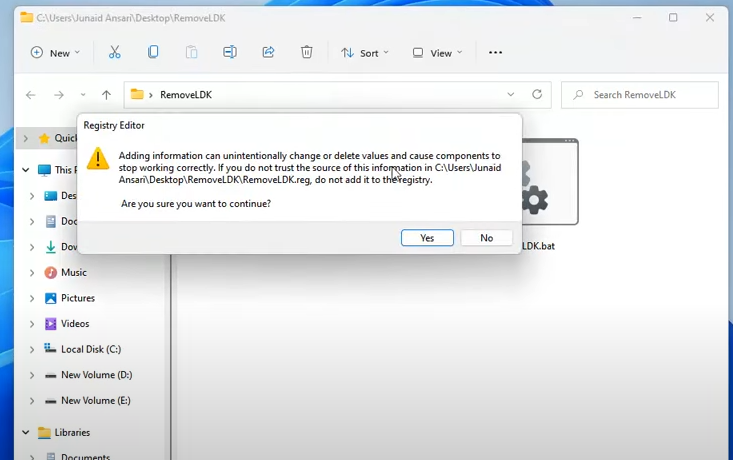
Bước 3: Chọn OK
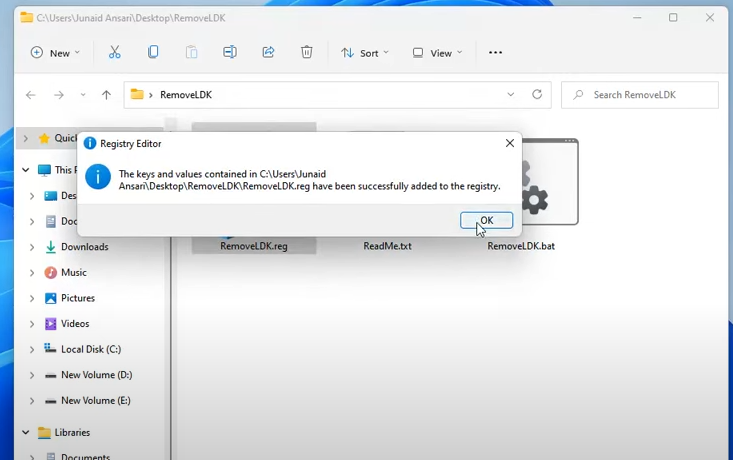
Hướng dẫn sửa Wilcom
Sửa lỗi: Internal error 0x7101 occurred
- B1: Tải RemoveLDK (Trong software của công ty)
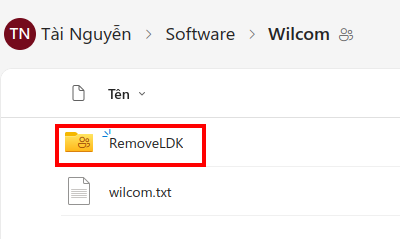
- B2: Tải về và chạy file .reg
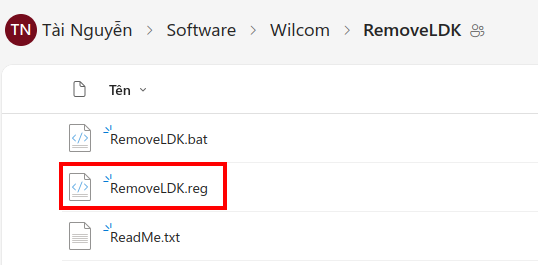
- B3: Done
Sửa lỗi Error59 trên windows 11 24H2
Biểu hiện
Cài đặt phần mềm bình thường nhưng khi mở phần mềm lên thì thấy báo lỗi Error59
Cách xử lý
Bước 1
Tải file sửa lỗi về theo đường dẫn
https://storages.tms-s.vn/f/6952799
hoặc
https://mobiedu-my.sharepoint.com/:u:/g/personal/tainc_mobifone_edu_vn/EZoMSFQl799Aiql0ZnqHigkBzLZYX3jcRE0ZVLogmP9y0A?e=VZEfJF
File name : KEYGEN Wilcom e4.2 - 24H2.zip
Bước 2
Giải nén và coppy file trong folder 1- HID.dll 2025 vào thư mục cài đặt của Wilcom
Bước 3
Mở Wilcom.
Bước này Wilcom sẽ báo lỗi không có bản quyền. Mình sẽ coppy mã HARDWARE ID vào notepad "ASHKDGH-SDHJGJH-ASDBNVBHJG" mã này sẽ đi chung với thông báo lỗi
Bước 4
Vào thư mục Keygen . Mở file Wilcom Embroidery Studio e4.2.exe .
Chọn License Manager
Bước 5
chọn Add License.
Nhập Customer , Company ( với tên tuỳ chọn )
Lưu ý Chỗ Hardware ID, mình lấy lại Hardware ID đã lưu từ file notepad trước đó
Sau khi xong 3 phần trên thì chọn Save
Tiếp đến ta chọn Create License Key
Bước 6
Sau khi xong Bước 5 License manager sẽ gen Folder có chứa customer-company mà mình đã chọn trong phần mềm
Vào thư mục đó và coppy file regkey.dat vào thư mục cài đặt của Wilcom
Bước 7
Tại thư mục customer-company đang đứng . chúng ta mở file license ( Type : Registration Entries)
Sau các bước trên chỉ cẩn mở lại Wilcom là được . Chúc các bạn thành công
Ref : https://www.youtube.com/watch?v=BhhlGhHrp4k Link Posts : https://www.patreon.com/posts/solucion-error-129314475 Pass unrar : error59
Note Outlook
Sử dụng imap:
-
Sử dụng nhiều thiết bị
-
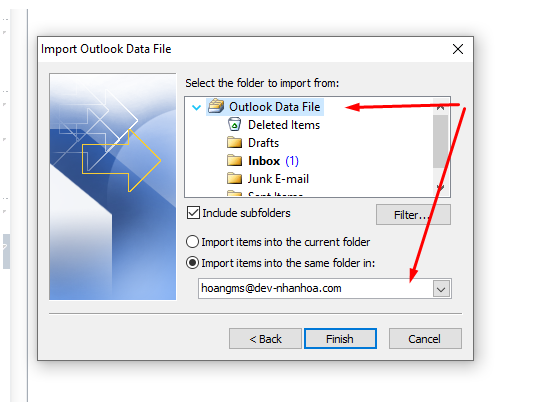
không được import file pst vào dữ liệu sync vs gmail, outlook sẽ sync dữ liệu ngược lại lên trên gmail, duplicate filter trên outlook. file pst của outlook sẽ bị hỏng
-
Import data file vào nên chọn:

- Gen ra folder nằm ngoài data sync từ gmail. - Chọn "import items into the current folder" sẽ import trực tiếp vào mail, nếu có các filter giống vs filter trong mail nó sẽ duplicate filter. => Khuyến nghị: Khi dùng imap không nên import data file vào trực tiếp dữ liệu được sync với gmail.
Sử dụng Pop
- Sủ dụng 1 thiết bị. Nếu sử dụng nhiều thiết bị dữ liệu không đc đồng bộ.
- Đồng bộ mail từ gmail xuống outlook
- Đồng bộ filter từ mail xuống outlook
- Import data file sẽ nằm trên outlool không đồng bộ ngược lại lên gmail.
Hỗ trợ Remote Desktop bị hỏng
Dịch vụ hỗ trợ Remote Desktop bị hỏng
Có thể thử đăng ký lại các dịch vụ Windows dùng cho Remote Desktop bằng cách chạy lệnh sau trong PowerShell Admin:
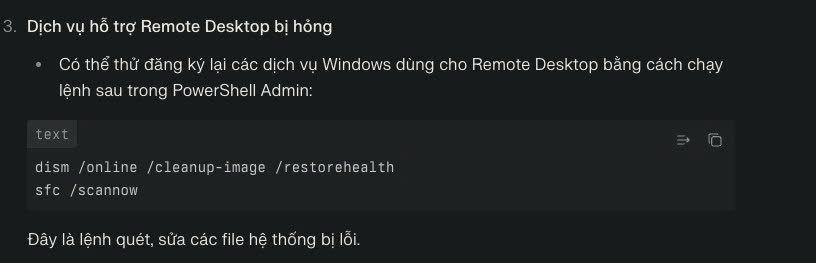
dism /online /cleanup-image /resorehealth
sfc /scannow
Microsoft Teams
Lỗi đồng bộ teams bị dính lỗi tồn tại shortcut.
- Truy cập teams -> Onedrive -> xoá lối tắt (unlink)
- Đồng bộ lại
Sửa lỗi Remmina không kết nối được vào server
1. Cơ chế mặc định (Enabled)
Khi bạn dùng card đồ họa rời NVIDIA mạnh mẽ ( x-vga=1 ), Windows 10/11 sẽ cố gắng ép giao thức RDP (Remote Desktop) sử dụng driver đồ họa WDDM của chính con card NVIDIA đó để xử lý hình ảnh truyền đi.
2. Xung đột xảy ra
Driver mã hóa hình ảnh của NVIDIA và trình điều khiển mạng của RDP không "hiểu ý" nhau, dẫn đến các hệ quả:
- Kết nối RDP bị treo đột ngột.
- Dịch vụ RDP bị crash ngầm sau vài phút.
- Gây ra lỗi không thể kết nối (
cannot connect).